06 November 2012

Let me stand next to your fire

*I found this blog, which had gone unposted.*
Yesterday we had an egg hunt for the kids. I was outside, hanging eggs from branches when the mailman pulled up to the house. He handed me a medium-sized package addressed to me. I gave it a toss, judging the weight. Yup, that felt like about ten pounds. Ten pounds of beeswax! I did a little happy dance, thanked the bewildered mailman, and skipped inside to share my joy with my mother and sister.
Two years ago I hand-dipped tapers as part of our Winter/Christmas celebration. It took a long time, but I found it almost meditative and relaxing. However, I don't have a whole lot of empty time to dedicate to standing over a hot stove for hours on end, especially when what I'm making isn't dinner. I wanted to delve further into candle-making this year. I scored on some used molds, and I found beeswax for $6/lb. I'm in love with beeswax. I love the color, smell, how it feels on your skin. It's just chocked full of nostalgia. That and my adoration for honey have even piqued my interest in beekeeping.
Candle-making is pretty simple but still time-extensive. Fill a pot with a few inches of water and simmer. Since I am pouring the wax this time, I used a metal bowl. If you are hand-dipping, you can use a tall can or canning jar. If using a jar, put a towel at the bottom, so the glass doesn't get too much direct heat and break.
Keep the heat on low, add the wax to your container, and occasionally check on its progress. While you are waiting, you can trim your wicks and set up the molds. Once melted, pour into mold, or get to dipping. If dipping, cover your working space with foil to catch the drips and reuse. You can use lots of household items for molds. It just has to withstand the heat. Reuse food cans and jars, cookie cutters, baking tins, etc. My mother-in-law used to make candles with the recipient's favorite soda can.
Today I'm making some unscented votives and some with lavender. I used essential oil and dried buds. There are lots of things you can add to candles, such as coloring dyes, oils, spices and herbs (avoid cloves; they are combustable!), sticks, and dried flowers. They make great gifts and are very practical, especially during power outages. When the candles age, they get this dusty look to them, which I think is so cool. It's kind of shabby chic, heavy on the shabby.
I think I like making candles just because it is fun. It doesn't take a whole lot of prep or money, but you get immediate gratification.

We be jammin'

15 pounds of frozen strawberries. That's a lot of smoothies. Although we don't typically go gaga for smoothies in November. It's cold enough already. Ya know what's perfect on a cold morning? Hot biscuits. Ya know what's perfect with those biscuits? Yeah, but besides gravy. Yes, but besides apple butter. Ooh, molasses...
No. Strawberry jam! Strawberry jam is what goes on the biscuits!
I have been on a mission to find the perfect jam. I probably just need the perfect berries, but I gotta work with what I got. The little lady and I tried out a new recipe. She had too much fun mashing the strawberries.


1. Combine 6 cups mashed strawberries, 1 cup water, and 4 ½ Tbsp low/no sugar pectin. 2. Bring to a hard boil for 1 minute. 3. Add sugar if needed. (Just taste it! I used 1 cup; they were tart berries. Return to a hard boil for 1 minute.) 4. Fill jars, leaving 1/4” headspace. Process for 10 minutes in a hot water bath.
I use the plate test. You know it's ready when you can drag your finger through the jam on a plate, and it leaves a path. If it runs back together, it needs a little more cookin'.
We had breakfast for dinner, which is commonplace for us, and the jam was wonderful. Bright and sweet but not too sweet.

12 October 2012

Recycle Your Food!

Chicken & Turkey Broths
Making stocks and broths is the best way to squeeze out all you can for your dollar. I have made it a habit to save all vegetable skins, ends, peelings, and small amounts that won't be eaten before spoiling. Really think about anything you would normally toss out—carrot tops, broccoli stems, onion and garlic skins, potatoes peelings, etc. I keep a bin in the freezer and just add to it.
I also store meat bones in the freezer. Just toss them in a bag and label until you have enough for a proper batch. These also come in handy when cooking beans or greens. We like meat in everything down here. (If you don't believe me, just ask what vegan items they have at Cracker Barrel.) You can use raw or already cooked. Leave the meat on or not. I love roasting poultry stuffed with onions and celery in the cavity. After I've picked the bones clean, the whole carcass gets tossed in the pot, so I get double duty out of those aromatics.
I was able to laugh at myself when my husband gave me a sideways glance during an episode of Portlandia. “We can pickle that!” became another tagline, along with “Just whipstitch it.” But that's another post...
When I have enough bones and/or veggie scraps saved in the freezer, I dump it in the pot and fill with water. I don't really measure anything. Think of it as tea; steep to your desired strength. I refrain from adding herbs or salt, as I prefer to save that for when I'm actually cooking with it. You can use a slow cooker on low overnight or simmer for a few hours on the stove. I recently began reducing my broth to save on shelf space. I remove the lid and simmer until the liquid has reduced by half. If needed, you can thin it out with water.
I used to freeze stock in quart-sized baggies. Lay them on their sides in a pan until frozen solid. This thin shape thaws much quicker and is easier to store. Or freeze in an ice cube tray, then transfer to a large baggie. This is perfect for adding just a bit to sauces. Now, I can it. I find it easier as there's no thawing. Quarts process for 25 minutes at 10 pounds in the pressure canner.
Wait! Don't throw it out. Once you have taken care of the broth, the leftover veggies can go to the composter or a worm bin when cooled, or out to the animals if you have them. However, cooked bones should not be eaten by animals, as they may splinter and cause tears or punctures.
Now that you have stock, what do you do with it? Lots of things! With fall around the corner, I'll be making lots of soups and stews. Replace or cut your water with it for more flavor in your rice. Make savory mashed potatoes. Dressing and stuffing. Perfect in gravy. Roasting liquid. Marinates.
Making stock is a great use of your food “waste” and an essential staple in the kitchen. Really, it's the ultimate way to recycle food.

Applesauce!

Now is the time to savor apples and pears. Last year, I took advantage of local pears sold at our grocery store for $1/lb. I made pear butter, spiced with ginger and nutmeg, which goes great with pork and chicken. This year, I wanted to try apple butter. I'm simply nuts about apple butter and pumpkin butter. I cannot not try it when available.
Applesauce & Apple Butters
A new friend from work mentioned that she makes applesauce every year. We decided to join forces. This really is the best set up. You have someone to share the work and cost, and you get some quality time in as well. While working through batches, we looked at family photos, enjoyed tamales and margaritas, and swapped stories. I've only done a couple canning projects with friends, but so far they have taken at least 8 hrs no matter how much you are making. Make sure you have a full day to get everything done. When I'm on my own, I can easily check on things in between loads of laundry or Portal tests.
She found a great deal from a local orchard. We purchased slightly more than 100lbs for $78. It was a mixture of Red Delicious, Mutsu, and Rome. Out of that amount, we made 26 quarts. I got 5 half-pints of apple butter from 3 quarts of applesauce. You can easily see how this is not very productive or cost effective. Quarts of applesauce came to $3; apple butter costs $3.75. This is only counting for the apples and no sugar or spices, which would add only pennies anyway. The only supply costs we had were lids at about $6.
Two different batches; the one on the right was cooked longer.
While I had a blast doing it, and my apple butter is damn good, I don't think I'll be repeating this next year. Sadly, both kids vetoed the applesauce, so all of it is going towards apple butter. Now, if I can score on some quality apples or pre-made applesauce, I'll be adding to the shelf. Sometimes you can find “seconds,” imperfect apples with minor flaws, for an even better deal. Growing up, a neighbor had an apple tree that was pre-existing, and they did not even use them. I remember the Barefoot Farmer gathering apples that had fallen by the road that would otherwise rot. It never hurts to ask or get creative! Many orchards provide pick-your-own prices. This is a great idea for families, as everyone can be involved. One day, I would love to have some apple trees of my own. Then I could make cider, too!
It was definitely worth the experience, and nothing comes close to the taste. You can actually smell the blossoms and almost feel the fall breeze dancing through the branches.

  1. Rinse apples. Peel if not using a mill.
  2. Cut into 1” chunks. And place over medium heat in a pot.
  3. Add sugar to taste and a pinch of salt. You may also add spices if desired. Add ¼ cup water if necessary so that the apples don't scorch on the bottom.
  4. Once the apples start to break down, ladle into your mill or processor. You may use a blender if you want a smoother product.
  5. Ladle into hot, sterilized jars and process in a water bath for 20 minutes.
  6. If making apple butter, return sauce to low heat until desired thickness is achieved. (I cooked mine for 2 days on low in the crock pot.) Process in water bath for 20 minutes.

Canning: For Beginners

If you are new to canning and not sure if it's your cup of tea, I'd recommend picking up a couple essential tools and try a simple jelly. No need to make a big purchase. I found some ideas on how to make your own tools, but I highly recommend purchasing or borrowing a jar lifter. They run about $4 new, so it's not a big investment. Some sort of rack is essential, but everything else is optional. Ball even has a “Discovering Canning Kit” if you want a no-brainer option. You can find secondhand jars through thrift stores, yard sales, and craigslist. (Availability tends to be better during the winter and beginning of spring.) You must use mason jars; others will break. New lids must be used every time, but rings are reusable. New jars come with lids and rings, and run no more than $10 for a dozen, depending on the size.
A couple definitions: headspace refers to the distance from the rim of the jar to the food. Processing time begins when the water has reached a full, rolling boil, or when the correct pounds of pressure is reached if pressure canning. Pectin comes either powdered or liquid, and they are not interchangeable. They can be found by the canning supplies or in the baking aisle, along with flour and sugar. The general expiration for home-canned goods is one year.
I have used this fruit juice jelly recipe several times to make cranberry, grape, and apple jellies. (I bet adding a stick of cinnamon to apple would be great this time of year!) If you enjoy breakfast or a PB&J, then it will go fast, and it is very simple to make.

4 cups unsweetened juice (cranberry, apple, grape, orange, or a combination)
¼ cup lemon juice
1 1.75oz powdered fruit pectin
4 ½ cups sugar

  1. Combine juices and pectin in a pot. Let stand for 2 minutes, then stir to dissolve.
  2. Bring to a rolling boil, stirring frequently.
  3. Add sugar and return to a rolling boil, stirring often.
  4. Boil hard for 1 minute, stirring constantly.
  5. Remove from heat. Skim off foam with a spoon.
  6. Ladle into hot, sterilized jars. Leave ¼ inch headspace.
  7. Top with lids and rings. Process for 5 minutes.
  8. Carefully remove from pot and let cool. (Use a cooling rack or place a towel on the counter to avoid heat shock.) Label and store in a dark, cool place.
Cranberry & Grape Jellies

27 September 2012

Bacon + Pecans + Pie = :D

It's time for pie! The leaves are starting to turn. Nights require a jacket. I adore fall. I have been craving some pecan pie lately, and I finally caved in...with a couple twists.
I wanted to try out a recipe that doesn't rely on corn syrup. I literally only buy corn syrup for pecan pie, so it would be nice to permanently scratch that off the grocery list. A bit of history for my fellow food nerds: The wife of the owner of Karo corn syrup was the first to publish what we all know as pecan pie. Corn syrup originally was not very popular. It was a newer product when most people were used to regular cane sugar. As an incentive, they began printing her recipe on the back of the bottle. It caught on so well that I have never made, seen, or purchased a corn syrup free pecan pie. Until today that is. There are variations, but that's the general legend. History lesson over.
I also wanted to try out a different pie crust. My regular is just fine, but variety is the spice of life. I recently read an article on pie in Mother Earth News in which they discuss using whole wheat flour. I thought the nuttiness from the wheat might pair well with this savory and sweet filling. There has been a huge focus on pork products lately, especially lard and bacon. Now, bacon I'm familiar with, but until recently lard had been reserved for savory dishes, not dessert. Ever the bull-headed rebel, I had to try it. Don't worry; it's not a mess of grease. In fact, there isn't a “PORK!” flavor like one would expect. It's just a hint.
This pie filling is awesome. I have done bacon pecan pie before, but I have never used the fat in the pie and the crust! It works so well. The crust is layered perfectly and solid yet delicate. I really think the whole wheat balances the sweetness of the filling, and the salty, smoky bacon just sings. Of course, this is a rare treat. RARE TREAT. Please do not include this in your regular diet. I will not be held responsible for heart disease or diabetes. Maybe you should eat this while on the treadmill just to be safe.
Onto the yumminess!

Crust
  1. Combine 1 ½ cups AP flour, ½ cup whole wheat flour, and a pinch of salt.
  2. Cut or pinch in 3oz cold butter and 3 oz lard. You can use a fork, pastry blender, or your fingers. It is ready when it looks like wet sand and clumps inside your fist.
  3. Sprinkle 1 Tbsp vinegar and approximately 3 Tbsp iced water. You want the dough to hold together but still be stiff and not sticky. It's best to have to add more water than flour, so go easy.
  4. Cover and chill for at least 30 minutes in the fridge.
  5. Roll on a floured surface.
  6. Form and crimp edges. If you are not using the crust immediately, just toss it in the fridge.

Filling
  1. Combine 1 cup brown sugar, ¼ cup sugar, 1 Tbsp AP flour, 1 tsp vanilla, a pinch of salt, ¼ cup melted butter, and ¼ cup melted lard. *Make sure your fats are cooled, so the eggs don't cook next!
  2. Stir in 2 eggs and 1 Tbsp milk.
  3. Fold in 1 cup pecans and ½ pound crisp, crumbled bacon.
  4. Pour into pie shell. Bake for 10 minutes at 400, then about 35 minutes at 350. Pie is done when the edges are puffed but the center is still jiggly like jello.
  5. Cool for at least half an hour before cutting. Excellent served warm with vanilla ice cream and strong coffee.

20 September 2012

Canning, Part 1

I started writing a blog on canning and decided that it's too great of a topic to lump into one. Thus, there will be a series on canning. I'll throw in other posts in between for those of you who are not interested...but really you should be. And you hopefully will be by the end of this post. This one is all about why I love canning.
My beloved jars
It all started with a blue Ball jar I bought at a yard sale about 7 years ago. I just got it, because it was neat looking and really I'm a sucker for anything old. I still remember the woman explaining, “I would normally sell this for $15, but I can tell you will appreciate it. So you can have it for 5. I know you'll take good care of it.” I had no idea that jars were sought after collectables. However, I smiled and thanked the lady, thinking it could hold pens or cotton balls. I still have it. I have collected more jars over the years and cannot resist just checking at sales and thrift stores. My favorite is a Drey square jar. Hmm. More on that later!
More recently, I became more interested in gardening and eating locally. This naturally led to preserving. I quickly realized that green beans are not really growing 365 in Tennessee. So how can you enjoy those things that are out of season while not resorting to California imports? Well, I tried freezing first. But with the standard freezer/fridge setup, you can't really stock up on much. I was all too pleased that our current house came with one. However, I often forget what is in there, and some things must be thawed beforehand. I now mostly use the deep freezer to store discounted meats. I just roasted my last turkey in fact. Can't beat 69 cents a pound!
With canning, you can take advantage of produce at its peak, when the flavor is optimum and prices are low. You also have more local options. Consider tomatoes. Now, I can't stand raw tomatoes, but even I know a homegrown summer tomato is heaven compared to the bland, pink orbs from Argentina in December.
Another bonus is controlling ingredients, a definite plus for those with allergies or diet restrictions. I'm sure we've all stood there stupefied by the plethora of barbecue sauces, wondering which tastes best for pulled pork. Or wondering what in the hell disodium inosinate is. Or what exactly “natural and artificial flavorings” means. Well, when you make it from scratch, you know exactly what's in it and can cater it exactly to your taste and needs.
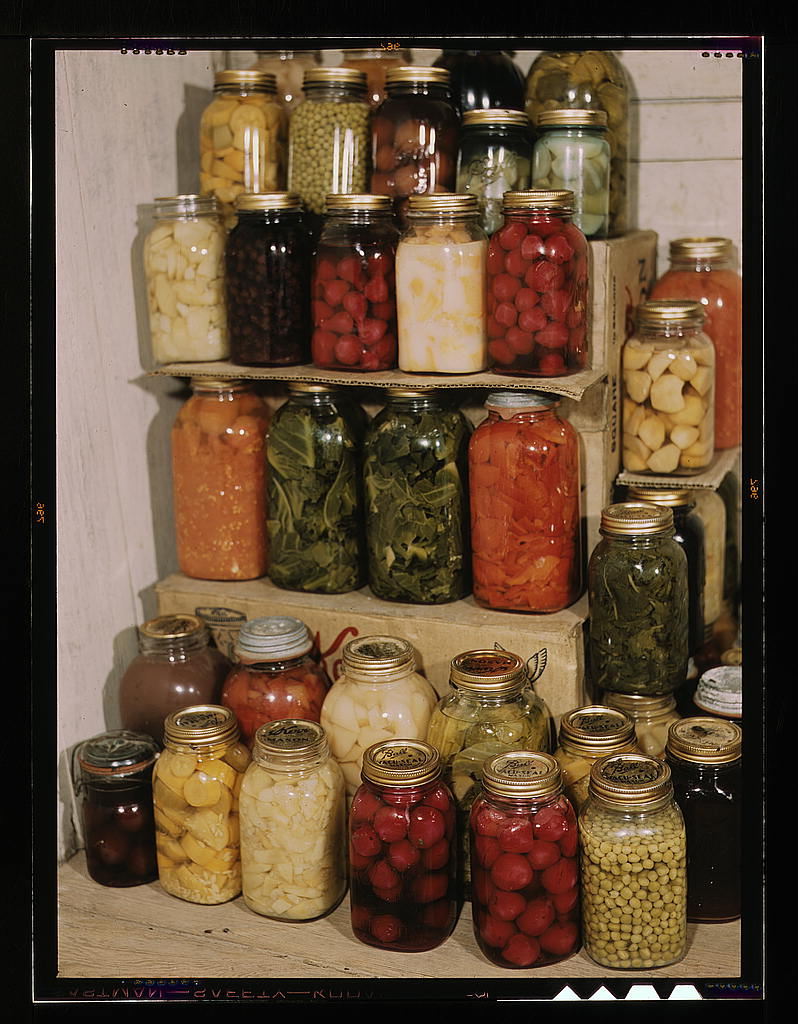
U.S. Office of War Information, 1944
Canning is also a great way to have heat-and-eat meals right on hand. It's not all pickles and jam. You can can (heh heh) meat, soups, sides...pretty much anything but pasta and grains. This lady canned bacon! Now, it was totally yanked from a mad scientist's lab, but a great option if you have limited fridge or freezer space. Perfect for trips up to the cabin or those off the grid. For the rest of us, a whole meal for four can be ready in minutes. That's sounds great to this working mother.
Last but certainly not least, canning is beautiful! (Except for the meat, that is.) I love seeing the rows of canned goods on my shelf. It's like a rainbow of food. I find it unbelievably comforting and calming to can. Passing by the pantry, seeing the glistening jars just puts a smile on my face. It's ridiculous really, but I love it that much.